Using mipidsi crate
This tutorial shows how to use the newer mipidsi crate with the TFT and ESP32.
The mipidsi crate is a unified crate for multiple displays and also supports ili9341.
Setup
The setup is same as the previous program except for a few changes to the Cargo.toml.
Cargo.toml dependencies
embedded-hal-bus = "0.3.0"
embedded-graphics = "0.8.1"
mipidsi = "0.9.0"
static_cell = "2.1.1"
The static_cell crate is used to provide a safe way to allocate heap memory or for dynamic memory management.
This is essential because the SPI buffer needs to exist for the entire program duration but cannot be initialized until runtime when the peripherals are set up.
mousefood and ratatui
Add the following mousefood and ratatui versions to Cargo.toml
mousefood = { git = "https://github.com/j-g00da/mousefood", rev = "cc9f8fe372f09342537bc31a1355f77f2693d70b", default-features = false, features = [
  "fonts",
] }
ratatui = { version = "0.30.0-alpha.5", default-features = false }
Imports
#![allow(unused)]
fn main() {
use static_cell::StaticCell;
use embedded_hal_bus::spi::ExclusiveDevice;

// ESP Stuff
use esp_hal::{
  delay::Delay,
  spi::{
    master::{
      Config as SpiConfig,
      Spi
    },
    Mode as SpiMode,
  },
  time::Rate,
  gpio::{
    Level,
    Output,
    OutputConfig
  },
  clock::CpuClock,
  main
};

// Embedded graphics stuff
use embedded_graphics::pixelcolor::Rgb565;
use embedded_graphics::prelude::*;

// TFT Screen stuff
use mipidsi::{Builder, models::ILI9342CRgb565, interface::SpiInterface, options::{Orientation, Rotation}};

// Mousefood stuff
use mousefood::{EmbeddedBackend, EmbeddedBackendConfig};
use ratatui::{layout::{Constraint, Flex, Layout}, widgets::{Block, Paragraph, Wrap}};
use ratatui::{style::*, Frame, Terminal};
}
There are a few configuration variables to be used here. This code is after the imports
#![allow(unused)]
fn main() {
static SPI_BUFFER: StaticCell<[u8; 512]> = StaticCell::new();
}
Initialize the TFT Display driver
#![allow(unused)]
fn main() {
let spi = Spi::new(
  peripherals.SPI2,
  SpiConfig::default()
    .with_frequency(Rate::from_mhz(60))
    .with_mode(SpiMode::_0)
)
  .unwrap()
  .with_sck(peripherals.GPIO18)
  .with_mosi(peripherals.GPIO23);

let cs = Output::new(peripherals.GPIO5, Level::Low, OutputConfig::default());
let dc = Output::new(peripherals.GPIO2, Level::Low, OutputConfig::default());
let reset = Output::new(peripherals.GPIO4, Level::Low, OutputConfig::default());

let buffer = SPI_BUFFER.init([0; 512]);

let spi_dev = ExclusiveDevice::new_no_delay(spi, cs).unwrap();
let interface = SpiInterface::new(spi_dev, dc, buffer);

let mut display = Builder::new(
  ILI9342CRgb565,
  interface
)
  .reset_pin(reset)
  .init(&mut Delay::new())
  .unwrap();

// CRITICAL: Set orientation BEFORE clearing and creating backend
display.set_orientation(
  Orientation::default().rotate(Rotation::Deg270)
).unwrap();

// Clear with the new orientation
display.clear(Rgb565::BLACK).unwrap();
}
Here the
ILI9342CRgb565driver is used instead of theili9341driver due to compatibility issues. In case of display issues you can switchILI9342CRgb565toILI9341Rgb565
Creating the Backend
To create the backend you use the mousefood embedded backend
#![allow(unused)]
fn main() {
let backend = EmbeddedBackend::new(&mut display, EmbeddedBackendConfig::default());
}
Then , you create the ratatui terminal which uses this backend
#![allow(unused)]
fn main() {
let mut terminal = Terminal::new(backend).unwrap();
}
Draw Function
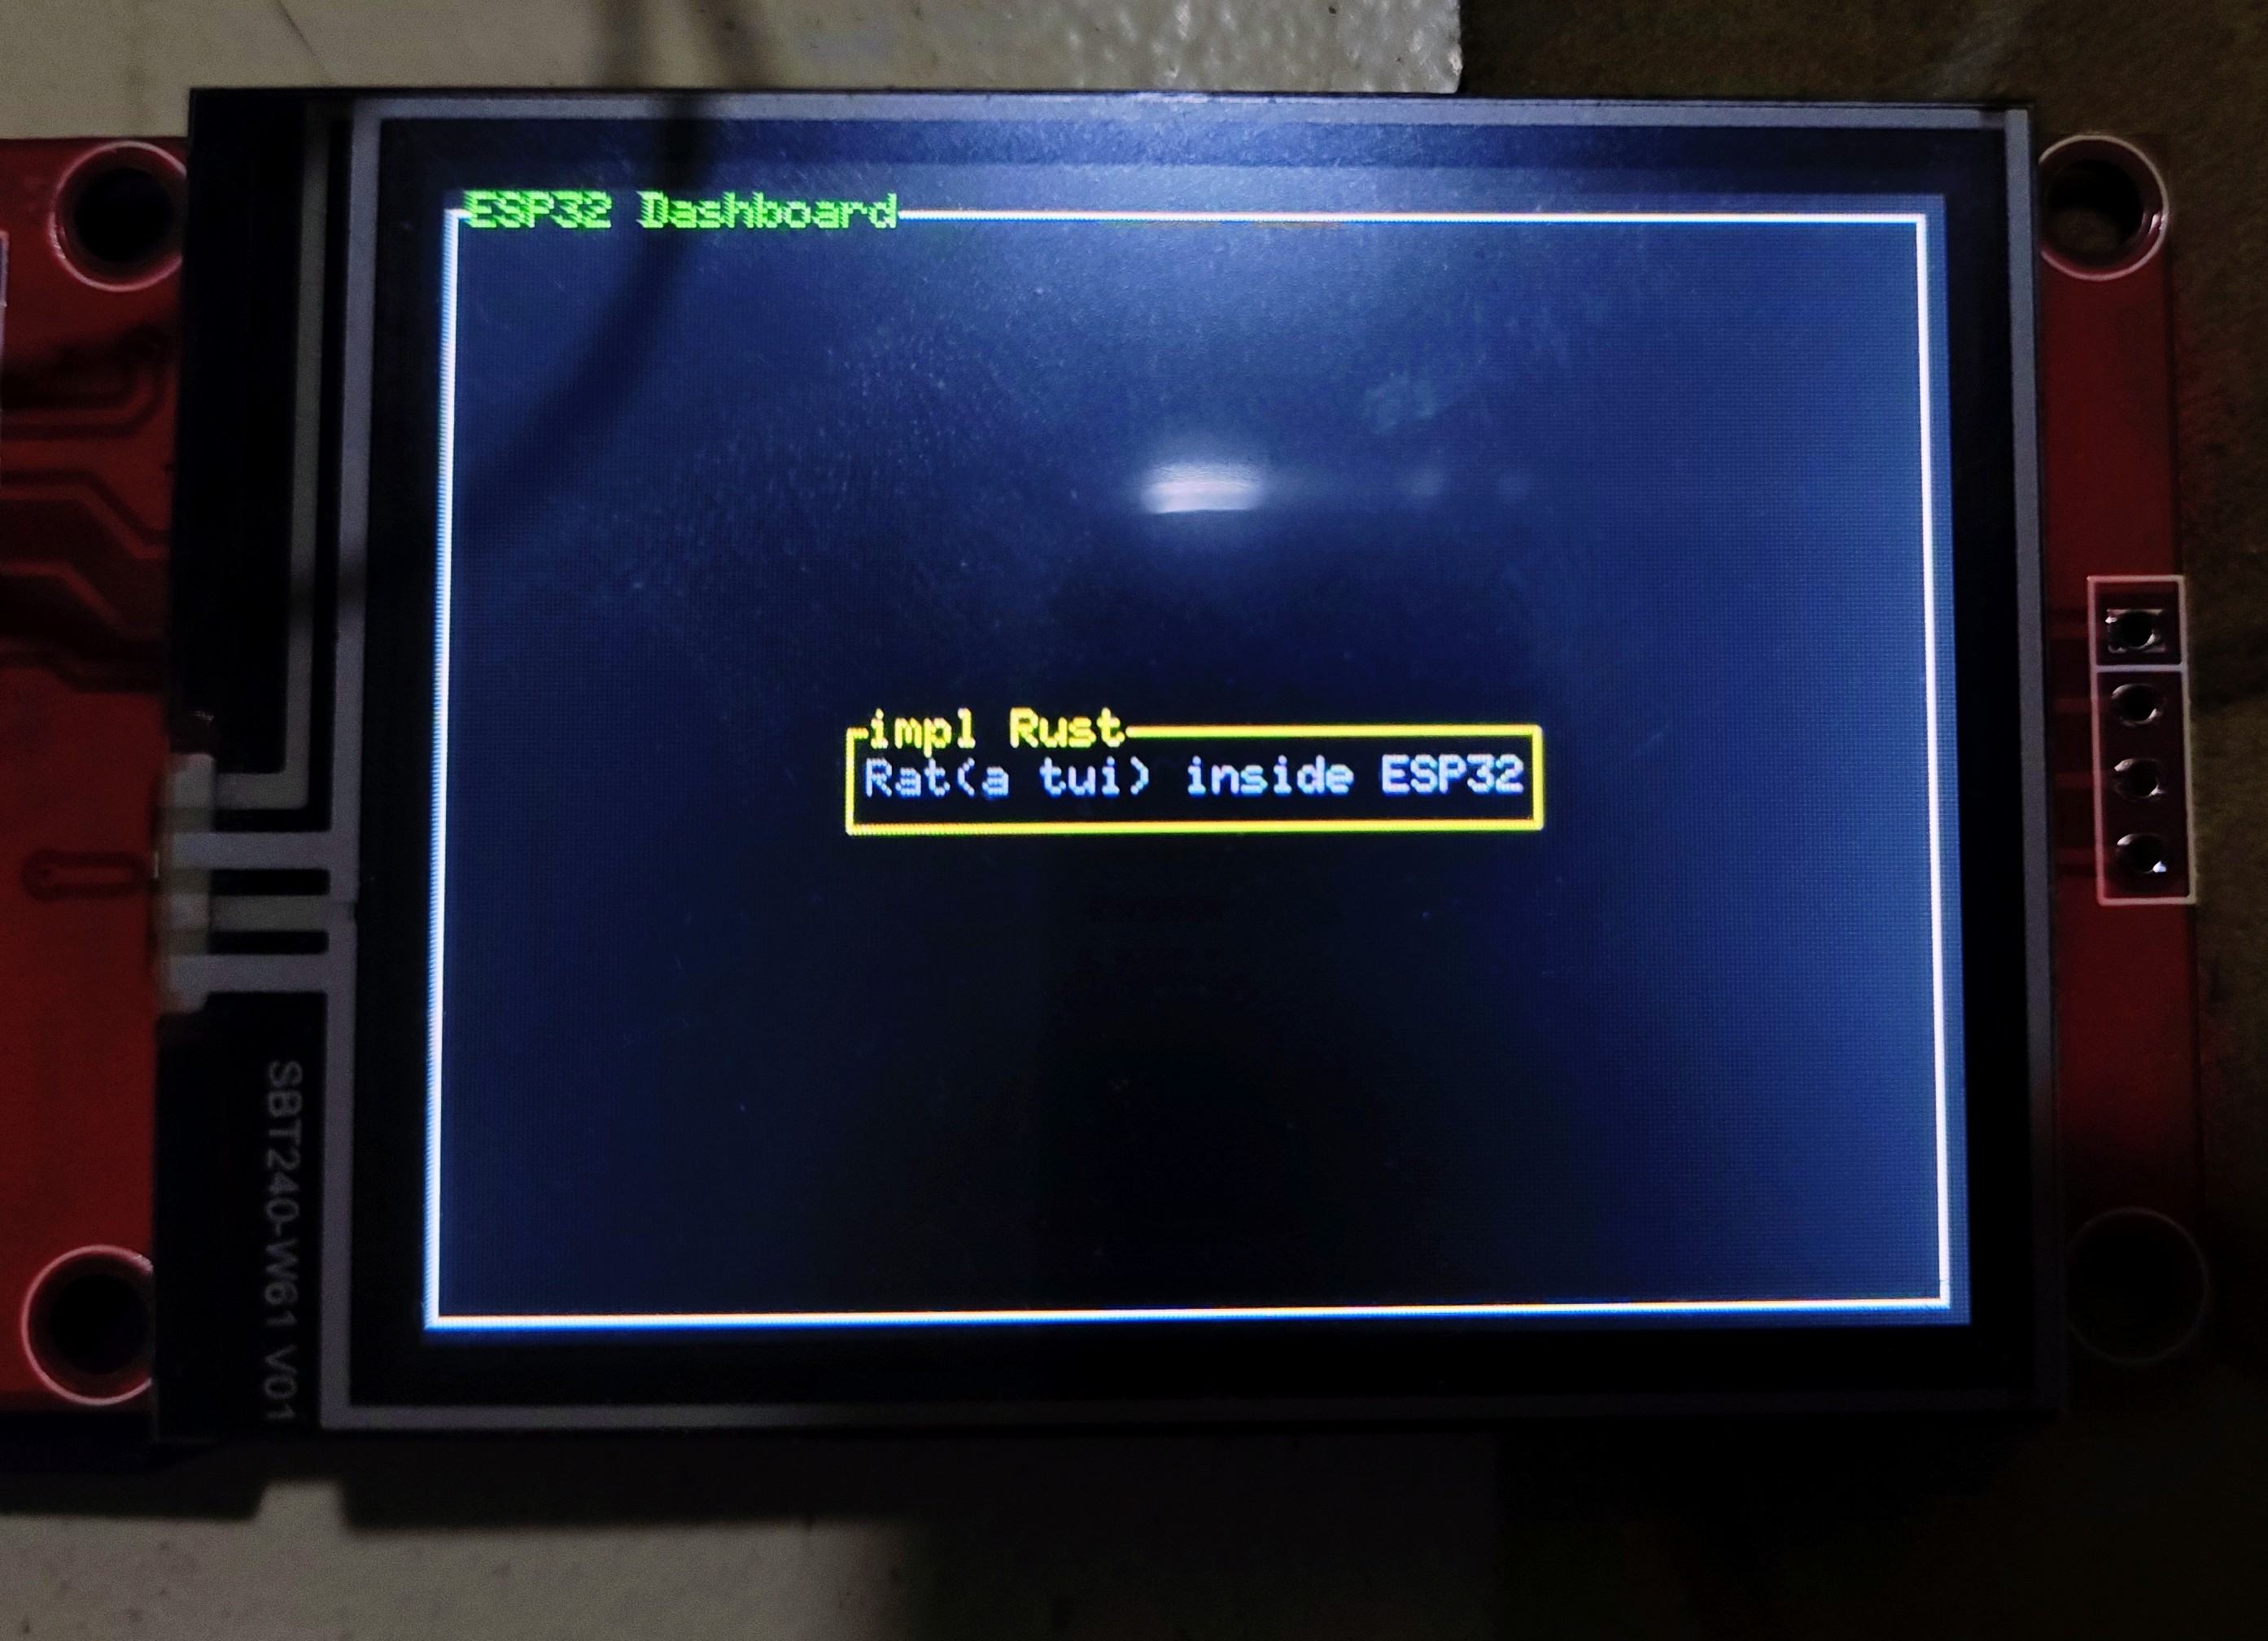
This function draws the visual elements of the TUI.
#![allow(unused)]
fn main() {
fn draw(frame: &mut Frame) {
    let outer_block = Block::bordered()
        .title_style(Style::new().green())
        .title("ESP32 Dashboard");

    frame.render_widget(outer_block, frame.area());

    let vertical_layout = Layout::vertical([Constraint::Length(3)])
        .flex(Flex::Center)
        .split(frame.area());

    let horizontal_layout = Layout::horizontal([Constraint::Length(25)])
        .flex(Flex::Center)
        .split(vertical_layout[0]);

    let text = "Rat(a tui) inside ESP32";
    let paragraph = Paragraph::new(text.dark_gray())
        .wrap(Wrap { trim: true })
        .centered();

    let bordered_block = Block::bordered()
        .border_style(Style::new().yellow())
        .title("impl rust");

    frame.render_widget(paragraph.block(bordered_block), horizontal_layout[0]);

}
}
Rendering
In the main function, after defining the terminal
#![allow(unused)]
fn main() {
loop {
  terminal.draw(draw).unwrap();
}
}
The Full Code
#![no_std]
#![no_main]
#![deny(
    clippy::mem_forget,
    reason = "mem::forget is generally not safe to do with esp_hal types, especially those \
    holding buffers for the duration of a data transfer."
)]

use esp_hal::clock::CpuClock;
use esp_hal::main;
use esp_println as _;

// Embedded Graphics related
use embedded_graphics::pixelcolor::Rgb565;
use embedded_graphics::prelude::*;

// ESP32 SPI + Display Driver bridge
use embedded_hal_bus::spi::ExclusiveDevice;
use esp_hal::delay::Delay;
use esp_hal::spi::Mode as SpiMode;
use esp_hal::spi::master::Config as SpiConfig;
use esp_hal::spi::master::Spi;
use esp_hal::time::Rate; // For specifying SPI frequency

use static_cell::StaticCell;

// For TFT Screen
use mipidsi::{
    Builder,
    interface::SpiInterface,
    models::ILI9342CRgb565,
    options::{Orientation, Rotation},
};

// For managing GPIO state
use esp_hal::gpio::{Level, Output, OutputConfig};

// For ratatui
use mousefood::{EmbeddedBackend, EmbeddedBackendConfig};
use ratatui::layout::{Constraint, Flex, Layout};
use ratatui::widgets::{Block, Paragraph, Wrap};
use ratatui::{Frame, Terminal, style::*};

#[panic_handler]
fn panic(_: &core::panic::PanicInfo) -> ! {
    loop {}
}

extern crate alloc;

// This creates a default app-descriptor required by the esp-idf bootloader.
// For more information see: <https://docs.espressif.com/projects/esp-idf/en/stable/esp32/api-reference/system/app_image_format.html#application-description>
esp_bootloader_esp_idf::esp_app_desc!();

static SPI_BUFFER: StaticCell<[u8; 512]> = StaticCell::new();

#[main]
fn main() -> ! {
    // generator version: 1.0.0

    let config = esp_hal::Config::default().with_cpu_clock(CpuClock::max());
    let peripherals = esp_hal::init(config);

    esp_alloc::heap_allocator!(#[unsafe(link_section = ".dram2_uninit")] size: 98767);

    // Initialize SPI
    let spi = Spi::new(
        peripherals.SPI2,
        SpiConfig::default()
            .with_frequency(Rate::from_mhz(60))
            .with_mode(SpiMode::_0),
    )
    .unwrap()
    //CLK
    .with_sck(peripherals.GPIO18)
    //DIN
    .with_mosi(peripherals.GPIO23);
    let cs = Output::new(peripherals.GPIO15, Level::Low, OutputConfig::default());
    let dc = Output::new(peripherals.GPIO2, Level::Low, OutputConfig::default());
    let reset = Output::new(peripherals.GPIO4, Level::Low, OutputConfig::default());

    let buffer = SPI_BUFFER.init([0; 512]);

    let spi_dev = ExclusiveDevice::new_no_delay(spi, cs).unwrap();
    let interface = SpiInterface::new(spi_dev, dc, buffer);

    let mut display = Builder::new(ILI9342CRgb565, interface)
        .reset_pin(reset)
        .init(&mut Delay::new())
        .unwrap();

    // CRITICAL: Set orientation BEFORE clearing and creating backend
    display
        .set_orientation(Orientation::default().rotate(Rotation::Deg270))
        .unwrap();

    // Clear with the new orientation
    display.clear(Rgb565::BLACK).unwrap();

    let backend = EmbeddedBackend::new(&mut display, EmbeddedBackendConfig::default());

    let mut terminal = Terminal::new(backend).unwrap();
    loop {
        terminal.draw(draw).unwrap();
    }
}

fn draw(frame: &mut Frame) {
    let outer_block = Block::bordered()
        .border_style(Style::new().green())
        .title(" ESP32 Dashboard ");
    frame.render_widget(outer_block, frame.area());

    let vertical_layout = Layout::vertical([Constraint::Length(3)])
        .flex(Flex::Center)
        .split(frame.area());

    let horizontal_layout = Layout::horizontal([Constraint::Length(25)])
        .flex(Flex::Center)
        .split(vertical_layout[0]);

    let text = "Rat(a tui) inside ESP32";
    let paragraph = Paragraph::new(text.dark_gray())
        .wrap(Wrap { trim: true })
        .centered();

    let bordered_block = Block::bordered()
        .border_style(Style::new().yellow())
        .title(" impl Rust ");

    frame.render_widget(paragraph.block(bordered_block), horizontal_layout[0]);
}
Clone the existing project
You can clone (or refer) project I created and navigate to the hello-rat-2 folder.
git clone https://github.com/ImplFerris/esp32-projects
cd esp32-projects/hello-rat-2/
Flash the program
Run the following command from your project folder (Containing the Cargo.toml) to flash the program to the ESP32
cargo run --release